Preface#
Most VPS server providers offer free Linux systems for installation, such as CentOS, Debian, Ubuntu, etc. So why use a one-click DD script to reinstall/change the system? 1. The system versions provided by the providers are limited and may not have the version you need. 2. The provider's system installation may include unwanted services, such as Alibaba Cloud Shield (安骑士) in China. 3. The provider's system may not be able to install specific software, such as the kernel-dependent "Ruishi" (锐速).
In the above situations, a one-click DD script can help you replace the server with a clean system and solve your problems.
Environment#
- Architecture: KVM/XEN, does not support OpenVZ.
- System: Debian/Ubuntu/CentOS
Note#
- The Vicer script currently does not support reinstalling as CentOS 7 system, only supports CentOS versions below 6.9.
- The reinstalled system is sourced from the official distribution.
- The installation process is fully automated and does not require VNC operation or entering rescue mode.
- The default username after system installation is root, and the default password is: MoeClub.org
Reinstall as CentOS:#
In the following commands, replace -c with the CentOS version number, and -v with 64-bit/32-bit according to your needs.
CentOS 6.10 64-bit:
bash <(wget --no-check-certificate -qO- 'https://www.moeelf.com/attachment/LinuxShell/InstallNET.sh') -c 6.10 -v 64 -a
CentOS 6.10 32-bit:
bash <(wget --no-check-certificate -qO- 'https://www.moeelf.com/attachment/LinuxShell/InstallNET.sh') -c 6.10 -v 32 -a
Reinstall as Debian:#
In the following commands, replace -d with the Debian version number, and -v with 64-bit/32-bit according to your needs.
Debian 8 64-bit:
bash <(wget --no-check-certificate -qO- 'https://www.moeelf.com/attachment/LinuxShell/InstallNET.sh') -d 8 -v 64 -a
Debian 9 64-bit:
bash <(wget --no-check-certificate -qO- 'https://www.moeelf.com/attachment/LinuxShell/InstallNET.sh') -d 9 -v 64 -a
Debian 10 64-bit:
bash <(wget --no-check-certificate -qO- 'https://www.moeelf.com/attachment/LinuxShell/InstallNET.sh') -d 10 -v 64 -a
Debian 11 64-bit:
bash <(wget --no-check-certificate -qO- 'https://www.moeelf.com/attachment/LinuxShell/InstallNET.sh') -d 11 -v 64 -a
Reinstall as Ubuntu:#
In the following commands, replace -u with the Ubuntu version number, and -v with 64-bit/32-bit according to your needs.
Ubuntu 12.04 64-bit:
bash <(wget --no-check-certificate -qO- 'https://www.moeelf.com/attachment/LinuxShell/InstallNET.sh') -u 12.04 -v 64 -a
Ubuntu 14.04 64-bit:
bash <(wget --no-check-certificate -qO- 'https://www.moeelf.com/attachment/LinuxShell/InstallNET.sh') -u 14.04 -v 64 -a
Ubuntu 16.04 64-bit:
bash <(wget --no-check-certificate -qO- 'https://www.moeelf.com/attachment/LinuxShell/InstallNET.sh') -u 16.04 -v 64 -a
Ubuntu 18.04 64-bit:
bash <(wget --no-check-certificate -qO- 'https://www.moeelf.com/attachment/LinuxShell/InstallNET.sh') -u 18.04 -v 64 -a
Ubuntu 20.04 64-bit:
bash <(wget --no-check-certificate -qO- 'https://www.moeelf.com/attachment/LinuxShell/InstallNET.sh') -u 20.04 -v 64 -a
About the system reinstallation process#
After running the script with the correct system version number, the installation of the new system will proceed automatically without manual intervention.
Possible scenarios:
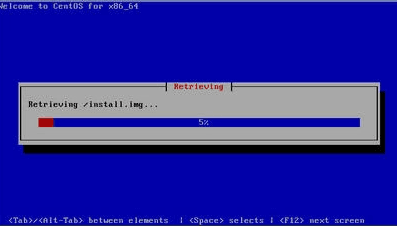
Under normal circumstances, the installation should be completed in about 10 minutes. You can observe the installation process in VNC:

If installing CentOS 7 version, the following prompt will appear, indicating that it is not supported:
If you enter an unsupported or non-existent system version, the following prompt will appear, and the installation will be aborted:
After reinstalling the system, change the root password. Please wait patiently for the successful installation of the system, and for security reasons, it is recommended to change the default password immediately.
Specific method:#
-
Log in using the default password provided above with an SSH software, and enter the following command: passwd root
-
You will be prompted to enter the new password twice. You can manually enter it or copy a password from elsewhere and right-click in the Putty interface to paste it.
Note: The new password will not be displayed directly and the cursor will not move. This is normal.
- When logging in to the system again, remember to use the new root password.